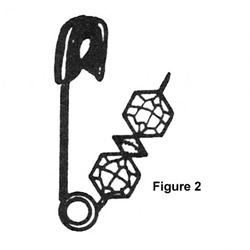
1. Look at Figure 2. It shows you the combination of beads used on the safety pins. After opening the pin, put on a 6mm crystal faceted bead, a 6mm spacer bead in the color of your choice (to match the 8mm faceted beads), and another 6mm crystal faceted bead. Make up all of your safety pins like this. In the future, this safety pin with beads will be referred to as a "safety pin assembly" or just "assembly." As soon as you have 96 assemblies, you can begin to put your bowl together.
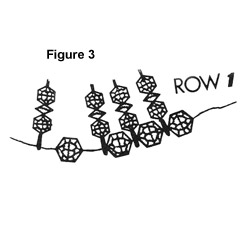
2. Figure 3 shows you how to begin putting the outside edge on the top row. Cut a 48" piece of the 24-gauge wire, and going through the hold in the large end of the pin, slip an assembly on the wire, and an 8mm faceted bead in the color of your choice. Continue adding a pin assembly and an 8mm faceted bead until you have added 96 assemblies, ending the row with an 8mm bead. No, go back and double-check your count and make sure that all of the assemblies are facing in one direction; it is much easier to do this now than later. Twist the two wire ends together several times, as closely as possible to the beads and pins. Be careful not to twist too tightly, so you do not break the wire.
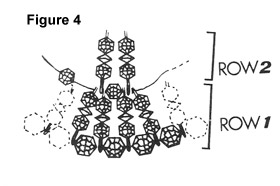
3. For the second row, you will need 48 pin assemblies. Cut a piece of 24-gauge wire 36" long and *go through the small end of a pin assembly from the first row, pick up a new pin assembly, going through the hole in the large end of the pin, and through the small end of another pin assembly from the first row. (see Figure 4.) Add a 6mm faceted bead. Repeat from * until you have added all 48 pins, remembering to keep all of the pin assemblies with the beads facing out.You will notice the part of your pin with no beads on it is on the top side of your work. Check your work carefully to see that you have missed no pins, and that all are facing in the same direction. Twist the wire ends together once again as closely and as tightly as you can. Try to stagger your beginnings so that all of your twists do not come in the same place as you add on your rows.
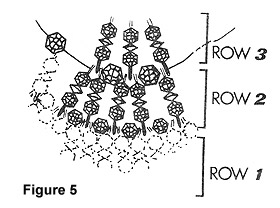
4. Cut a 30" piece of your 24-gauge wire and look at Figure 5 for the detail of adding the 24 pins you will need for the third row of the ruffle for your bowl. **Go through the hole in the small end of your pin from the second row, add a new pin assembly, pick up another pin assembly from the previous row with your wire, add an 8mm faceted bead and repeat from ** until all 24 pins are added, ending with an 8mm faceted bead on your wire. Twist the wire ends together once again as closely as possible to the beads.
5. This time, cut a 20" piece of 24-gauge wire. You add only 12 pins on this row, and you will keep the beads on the pins facing out. Use the exact same sequence as you did in Step 4, using 8mm faceted beads again between the pins. This time, however, when you add your new pin assembly, be sure to go through the small end of your new pin.
6. For the final row, cut another 20" piece of 24-gauge wire. ***Go through the large end from the previous row of your safety pin assembly, add a new pin assembly going through the small end, add a 6mm faceted bead, another new pin assembly going through the small end, and pick up a pin assembly from the previous row. Repeat this from *** around the row until you have added all 24 safety pin assemblies. Total number of pin assemblies you have used is 204, and you end this row with a 6mm rystal faceted bead.
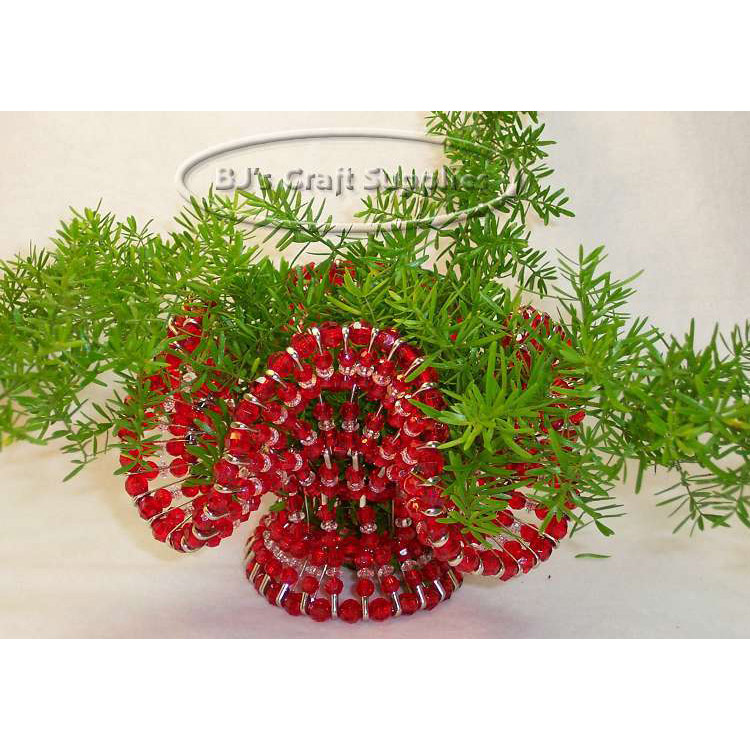
7. Cut a final piece of 24-gauge wire 12" long. See Figure 1 for how this step looks. You are working on the bottom edge of the bowl. Go through the head of a pin and add an 8mm faceted bead. Continue working around the row, going through the head of a pin and adding an 8mm bead until you have added all 24 8mm beads. Carefully twist together the ends, clip off the excess, and tighten the wire as tightly as possible without breaking the wire.
8. Go back and check all of your twists and tighten them down carefully. Cut off excess wire. Your bowl of beauty is now ready for admiration.